How to Handle a Roof Insurance Claim After a Storm

When a storm hits, your roof is your first line of defense—but it’s also the most vulnerable part of your home. Wind, hail, heavy rain, or falling debris can leave behind costly damage.
If you suspect your roof has been affected, acting quickly and strategically is key to getting the coverage and repairs you need. But how do you know what needs to be done?
For over a decade, Rescue My Roof has been serving Wisconsin homeowners. We’ve helped thousands of homeowners navigate the insurance process and keep their homes safe. Now, we’re here to help you, too.
In this article, we’ll give you a step-by-step guide to handling a roof insurance claim after a storm. Ultimately, you’ll know exactly what to do when the next storm hits.
Handling A Roof Insurance Claim: An 8 Step Guide
A severe storm can leave your roof damaged and leaking – but that doesn’t mean the repair costs are all on you. Homeowners insurance typically covers damage caused by “Acts of God,” including damage caused by storms.
Has your area been impacted by severe storms? Here are eight steps to follow to submit a comprehensive insurance claim.
Step 1: Inspect the Damage (Safely)
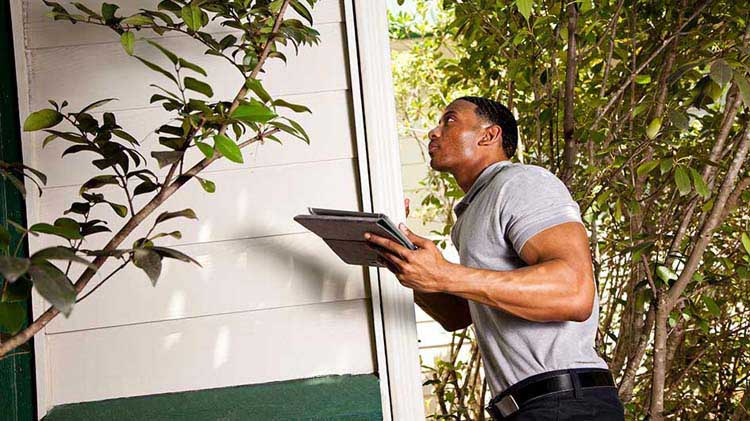
After the storm passes, walk around your home and visually inspect your roof from the ground. Look for visible signs like missing shingles, dented gutters, granules in downspouts, or obvious holes. And don’t forget to check your attic for leaks or water stains.
🔎 Important: Avoid climbing on your roof unless you’re a professional. It may be slippery or structurally compromised.
Step 2: Document Everything
Take clear, high-resolution photos and videos of the damage. Include shots of:

- Roof damage (shingles, flashing, gutters)
- Interior damage (ceilings, attic leaks)
- Fallen trees or debris on the roof
- Nearby homes with visible damage (if relevant)
This documentation will be crucial when filing your claim and protecting yourself against disputes.
Step 3: Review Your Insurance Policy
Before calling your insurance company, review your homeowner’s policy. Pay close attention to:
- Your deductible
- What’s covered and excluded (hail, wind, water damage)
- Time limits for filing claims
Knowing your policy helps you communicate clearly with your adjuster and manage expectations.
Step 4: Contact a Trusted Roofing Contractor
Before you file a claim, it’s smart to get a professional roofing inspection. Many reputable roofing companies offer free storm damage assessments and can give you a written estimate. This helps:
- Validate your claim
- Ensure nothing is missed
- Prevent insurance from denying or underestimating damages
💡 Tip: Choose a licensed local contractor with insurance claim experience—not a storm chaser.
Step 5: File the Insurance Claim
Now it’s time to call your insurance company or file your claim online. Provide:
- A description of the storm and damage
- Your documentation (photos, notes, estimate)
- Preferred roofing contractor (if applicable)
They’ll assign an adjuster to inspect your property, often within a few days.
Step 6: Meet with the Adjuster

When your adjuster arrives, make sure you or your roofing contractor are present. This ensures the damage is thoroughly reviewed, and you get the fairest assessment.
Your roofer can help explain damage that may not be visible to the untrained eye and can advocate on your behalf if there’s disagreement about the scope or cost.
Step 7: Review the Insurance Estimate
Once your adjuster sends their report, compare it to your contractor’s estimate. You can:
- Accept it and proceed with repairs
- Ask for a second inspection
- Have your contractor submit a supplement if they disagree
Step 8: Schedule Roof Repairs or Replacement
After approval, schedule your roofing project. Your contractor will typically handle all paperwork and updates with your insurance provider, especially if additional damage is discovered during construction.
💡 Pro Tip: Keep copies of all documents and invoices. Some policies offer supplemental payments for unexpected costs.
Storm Damage Repair
Dealing with roof damage after a storm is stressful—but with the right steps, you can navigate your insurance claim smoothly. Prioritize safety, act quickly, document thoroughly, and lean on professionals to help guide the process. With a qualified roofing contractor on your side, you’ll restore your home’s protection and peace of mind in no time.
Learn more with “6 Reasons It’s Crucial to Know Your Homeowners Insurance Coverage Before A Storm Hits” and “How to Protect Your Roof From Storm Damage.”
Dealing with storm damage? Don’t worry – Rescue My Roof is here to help. Contact us today to get a free estimate.