10 Steps to Installing a New Roof: What You Need to Know

Yikes. You have to tackle the massive project of installing a new roof. It’s not the ideal situation. You may be planning vacations or saving up for a new set of braces. Now you are stuck with what could be a time-consuming and expensive project: installing a new roof.
It can all be very confusing. Decking? Ventilation? 18 different types of roof shingles? What? Help.
At Rescue My Roof, we’ve been in your shoes before. We’ve worked with everyone- from pros who flipped houses and had seen countless roof replacements, to first-time homeowners who were taking their first steps toward upgrading their forever home.
Installing a new roof can seem daunting at first, but we’ve broken down all of the steps for you. With this complete guide to installing a new roof, you can feel confident that you are in control of your future roofing project.
What are the Components of a Total Roof Replacement
Welcome! You have taken the first steps to become a roofing master. Pretty soon, you will have enough knowledge to take control of your roofing experience.
But first, there are some basics that we need to cover, and that begins with asking: what on earth goes into building a roof?
The Layers of a Roof
A roof is like an onion or a parfait- it has layers. A lot of them. Each layer is labeled things like an “Ice and Water Shield” or “Flashing” or a “Gutter Apron.” If you are a roofing novice, you have never heard these terms in your life. And that’s okay because we’ll break it down for you.
Decking
Decking = wood. Specifically, it is the layer of plywood that everything else will lay on top of. It is the very base of your roof.
Often, if you notice sagging in your roof or mold growing in your attic (gross) this is where the problem is coming from. And in that case, your roof will need to be reduced.
Say adios to the soggy, moldy wooden boards and bring in something that won’t make your skin crawl.
Gutter Apron
If gutters can’t bake, why do they need aprons?
All jokes aside, while it would be very nice if your gutters could provide you endless baked goods, gutter aprons are necessary for another reason. A gutter apron is a piece of flashing (i.e. a thin piece of metal that prevents leaks) that goes from underneath of the shingles to the inside of your gutters.
This keeps water from running down the sides of exterior walls and causing other unwanted problems like mold and mildew. If you’re already footing the bill for a new roof, you probably don’t want to replace the siding too. Gutter aprons are here to save you.
Drip Edge
A drip edge is another piece of flashing that is installed at the same time as the gutter aprons. While gutter aprons are put onto the places of your home that are angled down, drip edges are placed on the parts that are angled up.
Wind-driven rain tends to sneak into these crevices and cause- you guess it- mold or leaks. Drip edges will make sure that no water enters the home in these areas.
Ice and Water Shield
If you live down south, this might be a part of your roof that most roofing companies don’t find necessary because of the climate. Make sure to ask follow-up questions with your roofing company if this is a product that interests you.
For everyone else, an Ice and Water Shield is placed near the eves (corners) of your roof. During the winter, when ice builds up on the roof, it will prevent water from entering your home.
Note: it will not prevent ice dams from building up, it will simply protect your home from the water if they do. It is a necessary step to take in homes that face a lot of water from rain or snowfall.
Synthetic Felt
Every roofing company’s nemesis: a rainy day, has appeared. What shall we do?
Never fear- synthetic felt is here. It is a temporary protection measure in case it begins to rain while the contractors are installing your roof.
If the project continues to get delayed… and delayed… and delayed, the synthetic felt can be left on for up to 60 days on its own and continue to protect your home from water damage and leaks.
Roof Flashing
Roof flashing is a method of waterproofing made from metal. Thin sheets of metal are used in areas like the gutters or chimneys where water is more likely to find its way into your home.
Additional flashing may be needed in areas like valleys and exhaust vents. This will make sure there is a water-tight barrier on your roof so that you will have no leaking issues.
Shingles
The finishing touch to wrap up your roof installation with a bow.
Shingles are the outermost layer of the roof. They are the most customizable part of your roof, with many different styles and colors to choose from.
To talk over the options most commonly used in your area or the costs of shingle types, contact your local roofing company to get an estimate. Depending on the costs of raw materials and transportation, these prices may fluctuate.
Preparing for a Roof Replacement
What do I have to do before the workers come for a roof replacement?
1. Cut your Grass
Making sure all yard work is done beforehand is good for two reasons. One, you’ll save yourself the trouble of attempting to do any necessary work while the crew is there. Two, it will help your crew during the cleanup.
If your yard is cut beforehand, it will ensure all nails that may have dropped from the roof are picked up with the magnetic roller. If not, grass and weeds may prevent it from working efficiently.
2. Make arrangements for pets.
If they are afraid of thunderstorms or loud noise, it may be too loud for them during the roof installment. Finding a safe place for them for a few days will be both a better experience for your furry friend and you.
3. Move vehicles out of the driveway.
A total roof replacement means there some materials will have to be torn off the roof first. To dispose of these materials, your contractor may bring along several trucks or a dumpster.
Whether it be trucks or a dumpster, the ideal location close to the house would be parked in your driveway. Removing vehicles is the key to ensure the cleanup process is even easier for the crew and keeps your valuable property from being damaged.
4. Take all valuables off of the interior walls.
Some vibrations from power tools may occur. To keep those valuable pictures frames with photos of your loved ones safe, take them off of the walls before the crew arrives.
5. Move lawn ornaments and garden lights to safety.
Crews will often use ladders to access your roof. To make sure they don’t damage and lawn ornaments or lights and clear the way from them, move them to safety.
6. Move and cover all patio furniture.
We get it, patio furniture is expensive. Protect your investment from potential harm by covering it up, and moving it out of the way.
Additionally, you will be helping out the crew by providing a nice, clear space to put ladders and additional equipment.
The Roof Installation Process
Now that you have prepared thoroughly for your new roof, installation can begin.
1. Roofing Materials are Delivered To Your Home
All of the plywood, underlayment, flashing, and shingles are to be delivered to your home. They will be delivered on palettes that may go directly on your roof, or in your driveway.
If the roof installation is delayed due to weather, the delivery of the materials will be the same. Any delays in the project will not change the date you can expect your materials to arrive.
2. Protecting Your Home During the Roofing Project
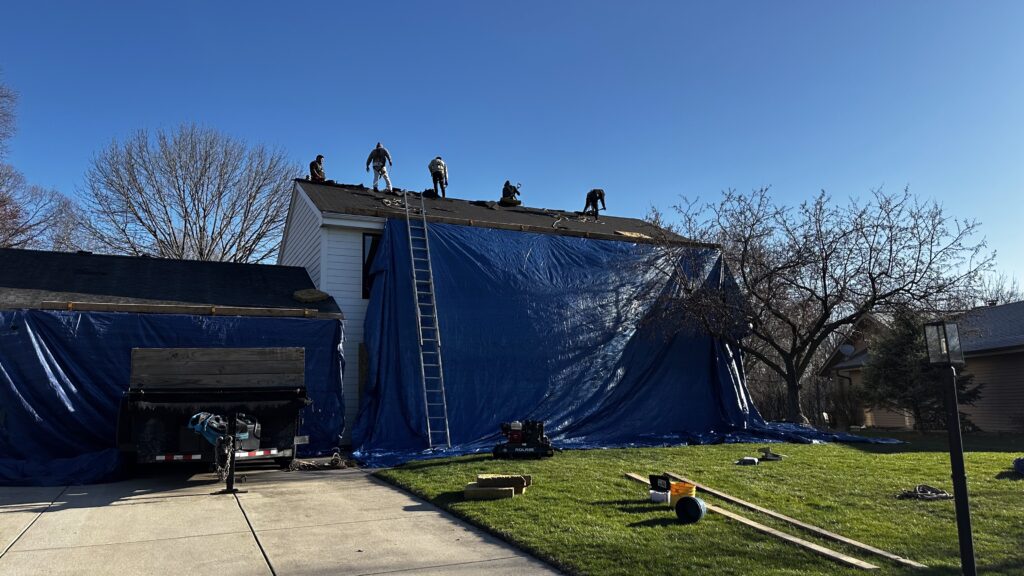
You’ve done your part, now we’ll do ours. We use plastic tarps to cover the exterior of the home, and may use plywood to cover some windows to ensure the safety of your property.
This typically takes only a half-hour of the total project time.
3. The Fun Part: Demolition
Let’s get this party started. But first, out with the old.
Your building crew will strip everything off of the roof down to the decking. This includes all of the shingles and the flashing. This step in the process goes faster than you may think, only taking up to two hours.
4. Inspection of the Roof Decking
When your crews can get a good view of the decking, they may notice things missed in the initial inspection.

With a clear view of everything going on, they might replace a few boards- adding unforeseen costs to the installation- or tell you they need to replace the decking altogether.
Be prepared, this is going to cost extra for additional materials. But it is a necessary step that will add longevity to your roof and safety to your home.
This step is also quite short, as it may only take up to an hour.
5. Installation of the Gutter Apron and Drip Edge
All of those flashy flashings we discussed earlier will be installed during this step of the process. This is the first step in making sure your roof is completely waterproof.
The Gutter Apron will be installed so that it will go under the shingles and over the gutters. The Drip Edge will be installed on any upward angles on the roof where wind-blown rain could potentially cause water damage.
6. Installation of the Ice and Water Shield and Synthetic Felt
The Ice and Water Shield will be installed around all flashings and penetrations on the roof, as well as the bottom six feet around your roof. Again, this will keep all water out of your home.
The Synthetic felt does the same, but it is installed over the entirety of the roof. This is done in case the project may have to stall due to rain.
If this is the case, the synthetic felt can be left on for up to 60 days, acting as a temporary roof to keep rain and snow out.
This step combined with step 5 only takes about an hour and a half to complete.
7. Install Valleys
Valleys are the area of your roof where two sloping sides meet. Water tends to pool in these areas, so your crew will focus on them to make sure no water can get through the flashings they place in these areas.
8. Install Shingles and New Flashing
Flashing around the chimney and exhaust vents goes down, and then it’s time for everyone’s favorite part: the shingles!
The contractors will begin to shingle your roof with whatever materials you chose. This is going to consume the rest of that 1-2 day time period that it takes to complete the roof without delays.
However, this is the part of the process where you may see delays. It is unsafe for crews to continue to shingle your roof in heavy rain. Additionally, we want to avoid the materials underneath being soaking wet as the shingles may not be able to adhere properly.
9. Installing Roof Exhaust Vents
It is important to have good roof ventilation, as we don’t want any mold or mildew issues later on. You are replacing your roof now- you don’t want to have to do it again.
Exhaust vents will be installed at the top of the roof and will provide an exit for the heat, hot air, and moisture in your attic.
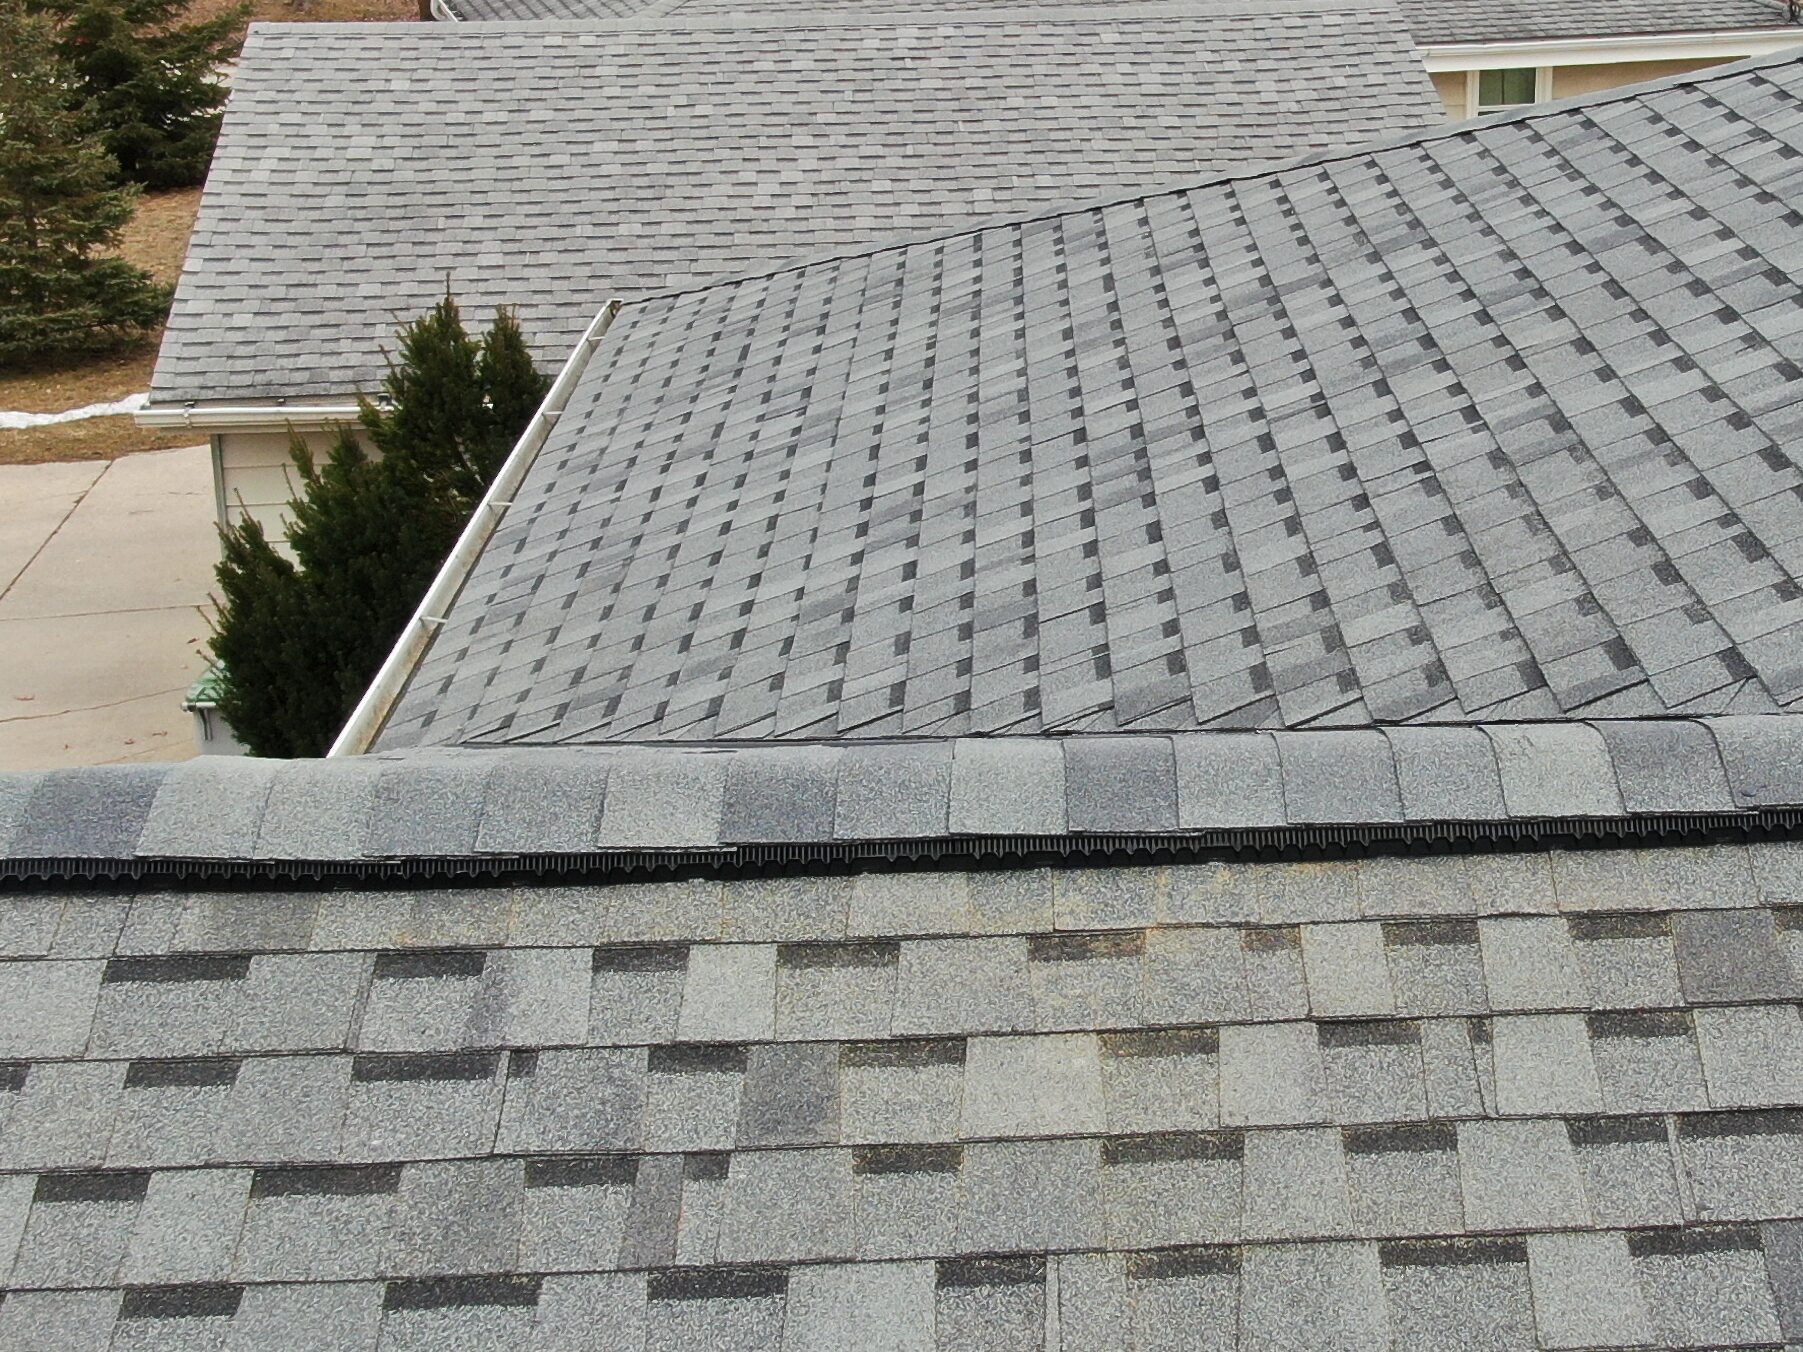
10. Installing the Hip and Ridge
The hip, which is the point where two planes of your roof meet vertically, and the ridge, where two planes meet horizontally, will need additional protection as well.
There are coverings made of shingles placed over these points to add that finishing touch to your roof.
Cleanup and the final roof walkthrough
Voila! Your roof installment is done, but the process doesn’t end there. Cleanup needs to happen to leave your home in better shape than when they found it.
Crews will take down all of the tarps and plywood, make sure there is no large debris on the ground, and use a magnet to make sure there are no rogue nails.
And, at the end of it all, you should be completely satisfied with the quality that you paid for. Meaning that your project manager should do a thorough walkthrough with you to make sure there are no issues.
So, that’s how a roof is installed?
Seems so simple once it’s all broken down, doesn’t it?
The roofing industry is full of a ton of jargon and slang that the masses struggle to understand- and that’s okay. That’s why we’re here. We want to empower you to make a great decision about your home’s care.
Whether you simply wanted to learn more about roofs or have a decision to make about how to go about installing a new roof, you can take a look at this comprehensive guide.
Still want to learn more about how long a roof takes, or what roofing service may be right for you along your buying journey? You can read more about those here:
How Long Will My Roof Replacement or Repair Take?
Tear-off Roof vs. A Layover Roof: Which is Best for Me?